在阅读《Unity Shader入门精要》时,跟着此书实现了案例shader,今天把第十二章介绍的屏幕后处理复现了一遍。包括屏幕明暗+饱和度+对比度、高斯模糊、运动模糊、Bloom、边缘检测等。记录一下。感谢乐乐女神~
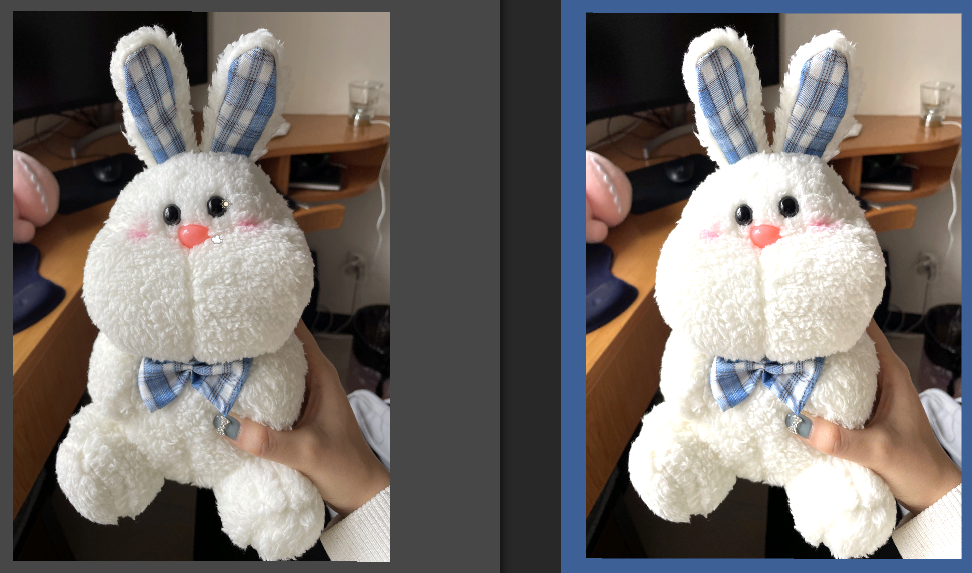
调整屏幕的亮度、饱和度、对比度
书中对于三种效果的调整分别为:对于像素点pixel(R,G,B,A),调整亮度,将四个对应的分量按倍数调整即可;饱和度是色彩的一种属性,表示颜色的鲜艳程度、纯度,色彩越高越纯。用CG中的lerp函数对饱和度为0的颜色与原颜色进行插值,lerp函数定义为:

对于对比度的话,对平均颜色(0.5,0.5,0.5)与原色彩进行插值。
至于为什么要这么调,要了解一下色相饱和度和HSL色彩模型….
关键shader
1
2
3
4
5
6
7
8
9
10
11
12
13
14
15
|
fixed4 frag (v2f i) : SV_Target
{
fixed4 col = tex2D(_MainTex, i.uv);
fixed3 finalcol = col.rgb * _Brightness;
fixed luminance= 0.2125 * col.r + 0.7154 * col.g + 0.0721 * col.b;
fixed3 luminanceCol = fixed3(luminance, luminance, luminance);
finalcol = lerp(luminanceCol,finalcol,_Saturation);
fixed3 avg = fixed3(0.5, 0.5, 0.5);
finalcol = lerp(avg, finalcol, _Contrast);
return fixed4(finalcol,col.a);
}
|
调整亮度的效果如:
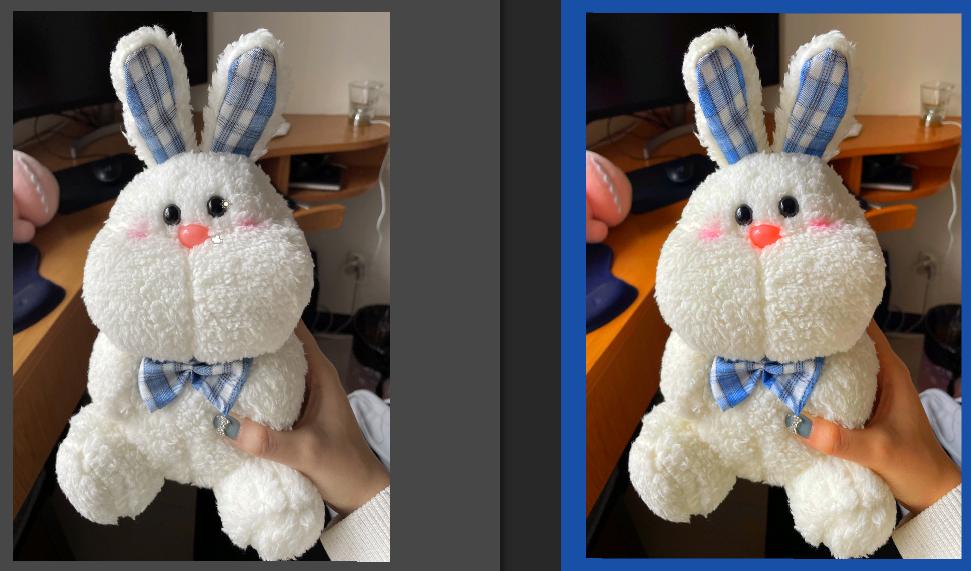
调整饱和度的效果如:
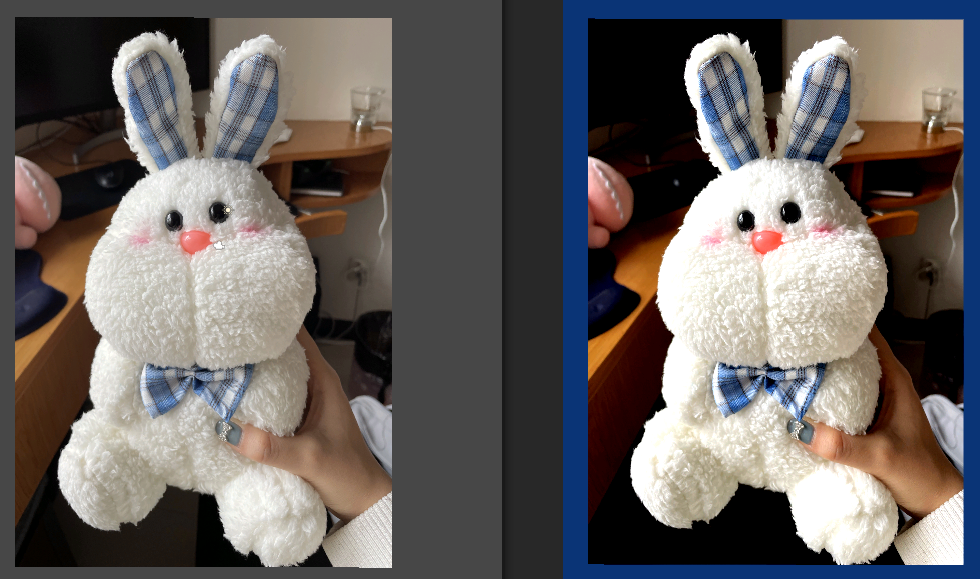
调整对比度的效果如:
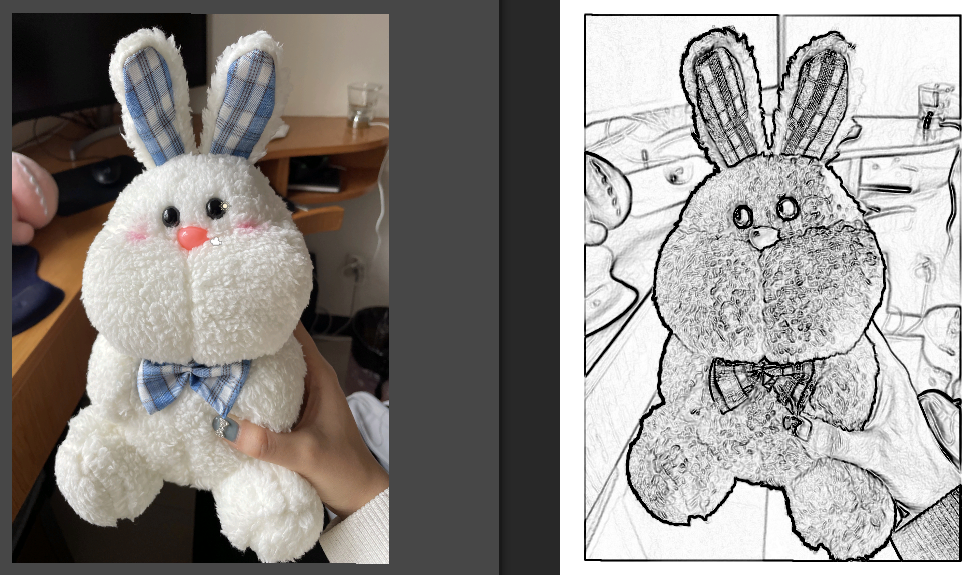
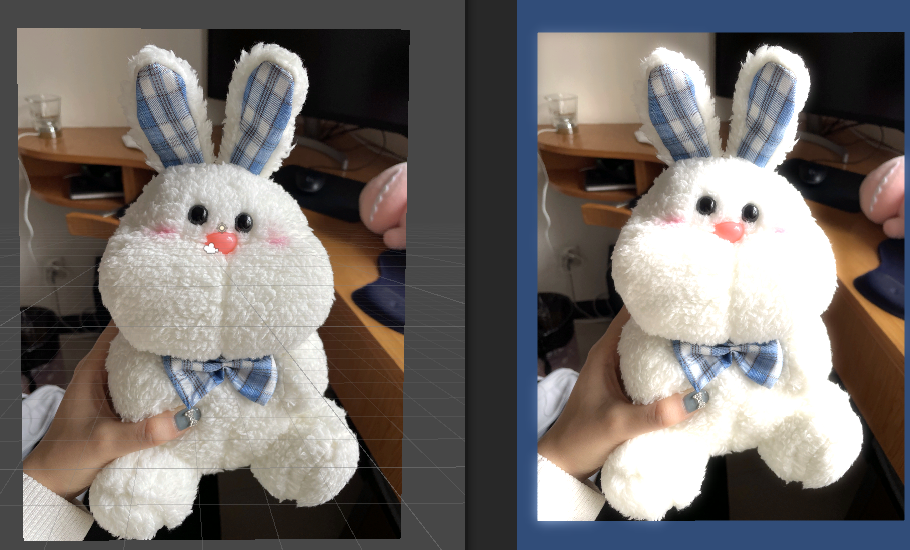
边缘检测
将图片中梯度变化大的像素点,染上黑色。样例中检测边缘,用的是边缘检测算子Sobel。
在vertex中计算检测算子覆盖的图像块像素值half2 uv[9]:TEXCOORD0;
1
2
3
4
5
6
7
8
9
10
11
12
| half2 uv = v.uv;
o.uv[0] = uv + _MainTex_TexelSize.xy * half2(-1, -1);
o.uv[1] = uv + _MainTex_TexelSize.xy * half2(0, -1);
o.uv[2] = uv + _MainTex_TexelSize.xy * half2(1, -1);
o.uv[3] = uv + _MainTex_TexelSize.xy * half2(-1, 0);
o.uv[4] = uv + _MainTex_TexelSize.xy * half2(0, 0);
o.uv[5] = uv + _MainTex_TexelSize.xy * half2(1, 0);
o.uv[6] = uv + _MainTex_TexelSize.xy * half2(-1, 1);
o.uv[7] = uv + _MainTex_TexelSize.xy * half2(0, 1);
o.uv[8] = uv + _MainTex_TexelSize.xy * half2(1, 1);
|
在fragment中利用检测算子对像素点卷积。
1
2
3
4
5
6
7
8
9
10
11
12
13
14
15
16
17
18
19
20
21
22
23
24
25
26
27
28
29
30
31
32
33
34
| fixed luminance(fixed4 color) {
return 0.2125 * color.r + 0.7154 * color.g + 0.0721 * color.b;
}
half Sobel(v2f i) {
const half Gx[9] = {-1, 0, 1,
-2, 0, 2,
-1, 0, 1};
const half Gy[9] = {-1, -2, -1,
0, 0, 0,
1, 2, 1};
half texColor;
half edgeX = 0;
half edgeY = 0;
for (int it = 0; it < 9; it++) {
texColor = luminance(tex2D(_MainTex, i.uv[it]));
edgeX += texColor * Gx[it];
edgeY += texColor * Gy[it];
}
half edge = 1 - abs(edgeX) - abs(edgeY);
return edge;
}
fixed4 fragSobel(v2f i) : SV_Target {
half edge = Sobel(i);
fixed4 withEdgeColor = lerp(_EdgeColor, tex2D(_MainTex, i.uv[4]), edge);
fixed4 onlyEdgeColor = lerp(_EdgeColor, _BackgroundColor, edge);
return lerp(withEdgeColor, onlyEdgeColor, _EdgeOnly);
}
|
边缘检测效果如(分别是在原图做边缘检测,原图非边缘区域设为白色):

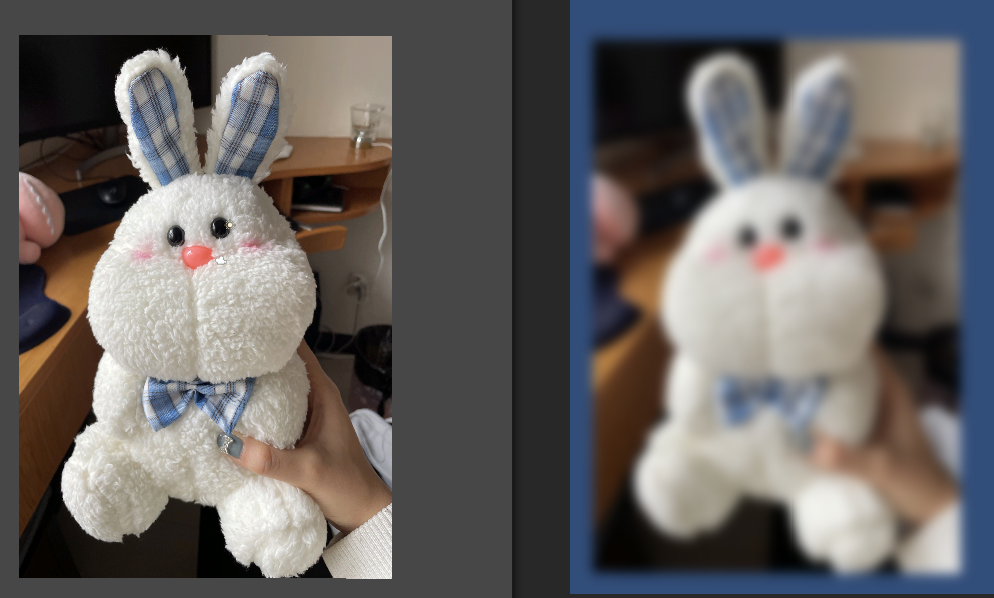
高斯模糊
对图片进行模糊有多种方法,其中比较常用的是高斯模糊。同上文说的边缘检测一样,高斯模糊也用到了卷积,卷积核被称为高斯核。利用高斯方程计算高斯核中每一个位置的值。高斯方程如下所示:
$$
G(x,y) = {e^{ (x^2+y^2) \over {2\sigma ^2}} \over {2\pi \sigma ^2}}
$$
其中$\sigma$一般取为1,$x$和$y$分别对应到卷积核的整数距离。计算出高斯核中每个位置的高斯值后,要对所有的权值除以权值和,避免图片变暗。因为大小为$M*M$的图片用一个$N*N$的高斯核进行卷积需要计算,采样次数达到$M*M*N*N$,当利用高斯核的可分离性质时,只需要计算$M*M*2*N$即可。
书中shader代码设置了两个Pass,分别计算两个高斯核。在script中设置了高斯模糊的迭代次数。script关键代码如下:
1
2
3
4
5
6
7
8
9
10
11
12
13
14
15
16
17
18
19
20
21
22
23
24
25
26
27
28
29
30
31
32
33
34
35
36
37
38
| private void OnRenderImage(RenderTexture source, RenderTexture destination)
{
if (material != null)
{
int rtW=source.width/downSample;
int rtH= source.height / downSample;
RenderTexture buffer0 = RenderTexture.GetTemporary(rtW, rtH, 0);
buffer0.filterMode = FilterMode.Bilinear;
Graphics.Blit(source, buffer0);
for(int i = 0; i < iterations; i++)
{
material.SetFloat("_BlurSize", 1.0f + i * blurSpread);
RenderTexture buffer1 = RenderTexture.GetTemporary(rtW, rtH, 0);
Graphics.Blit(buffer0, buffer1, material, 0);
RenderTexture.ReleaseTemporary(buffer0);
buffer0 = buffer1;
buffer1 = RenderTexture.GetTemporary(rtW, rtH, 0);
Graphics.Blit(buffer0, buffer1, material, 1);
RenderTexture.ReleaseTemporary(buffer0);
buffer0 = buffer1;
}
Graphics.Blit(buffer0, destination);
RenderTexture.ReleaseTemporary(buffer0);
}
else
{
Graphics.Blit(source, destination);
}
}
|
shader中的关键代码为:
1
2
3
4
5
6
7
8
9
10
11
12
13
14
15
16
17
18
19
20
21
22
23
24
25
26
27
28
29
30
31
32
33
34
35
36
37
38
39
40
41
| v2f vertBlurVertical(appdata v)
{
v2f o;
o.vertex = UnityObjectToClipPos(v.vertex);
float2 uv = v.uv;
o.uv[0] = uv;
o.uv[1] = uv+float2(0.0, _MainTex_TexelSize.y * 1.0) * _BlurSize;
o.uv[2] = uv-float2(0.0, _MainTex_TexelSize.y * 1.0)*_BlurSize;
o.uv[3] = uv + float2(0.0, _MainTex_TexelSize.y* 2.0) * _BlurSize;
o.uv[4] = uv - float2(0.0, _MainTex_TexelSize.y * 2.0) * _BlurSize;
return o;
}
v2f vertBlurHorizon(appdata v) {
v2f o;
o.vertex = UnityObjectToClipPos(v.vertex);
float2 uv = v.uv;
o.uv[0] = uv;
o.uv[1] = uv + float2(_MainTex_TexelSize.x * 1.0, 0.0) * _BlurSize;
o.uv[2] = uv - float2(_MainTex_TexelSize.x * 1.0, 0.0) * _BlurSize;
o.uv[3] = uv + float2(_MainTex_TexelSize.x * 2.0, 0.0) * _BlurSize;
o.uv[4] = uv - float2(_MainTex_TexelSize.x * 2.0, 0.0) * _BlurSize;
return o;
}
fixed4 fragBlur(v2f i) : SV_Target
{
float weights[3] = {0.4026, 0.2442, 0.0545};
fixed3 sum = tex2D(_MainTex, i.uv[0]).rgb * weights[0];
for (int it = 1; it < 3; it++) {
sum += tex2D(_MainTex, i.uv[it * 2 - 1]).rgb * weights[it];
sum += tex2D(_MainTex, i.uv[it * 2]).rgb * weights[it];
}
return fixed4(sum, 1.0);
}
|
模糊效果如下图
bloom效果
bloom效果,会使画面很亮的地方变的更亮了,并且这些地方的外缘地区也会变亮,看起来就像漏光一样。实现的主要思路是:将图片(最后的屏幕其实也是图片)中较亮的地方挖出来,高斯模糊一下,然后与原图片叠加。shader中就是使用四个Pass来进行操作,第一个Pass挖亮区域,第二个Pass竖直卷积模糊,第三个Pass水平卷积模糊,第四个Pass叠加。关键代码如下:
1
2
3
4
5
6
7
8
9
10
11
12
13
14
15
16
17
18
| ...
fixed luminance(fixed4 col) {
return 0.2125 * col.r + 0.7154 * col.g + 0.0721 * col.b;
}
fixed4 fragExtractBright(v2f i) : SV_Target
{
fixed4 col = tex2D(_MainTex, i.uv);
fixed val = clamp(luminance(col) - _LuminanceThreshold,0.0, 1.0);
return col*val;
}
...
fixed4 fragBloom(v2fBloom i) : SV_Target {
return tex2D(_MainTex, i.uv.xy) + tex2D(_Bloom, i.uv.zw);
}
|
代码中用到了clamp函数,cg library中对clamp解释如下:

bloom效果如下图:
参考文献
Unity Shader 入门精要